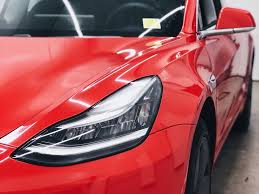
Chrome Vinyl Wraps are an excellent way to give your vehicle a sleek, modern look without the permanence of a paint job. However, applying these wraps requires careful attention to detail to ensure a smooth, bubble-free finish. Here’s a concise guide to help you apply chrome vinyl wraps like a pro.
"Step 1: Gather Your Materials"
Before you start, ensure you have all the necessary materials on hand. You will need:
- Chrome vinyl wrap
- Squeegee
- Heat gun or hairdryer
- Microfiber cloth
- Cutting tool (like a utility knife)
- Surface cleaner
"Step 2: Prepare Your Vehicle"
Thoroughly clean the surface of your vehicle where the wrap will be applied. Use a surface cleaner to remove dirt, grease, and any wax residues. A clean surface is crucial for the vinyl to adhere properly and to avoid bubbles or wrinkles.
"Step 3: Measure and Cut the Vinyl"
Measure the area you intend to cover and cut the vinyl wrap accordingly, leaving a few extra inches on each side. This excess will give you some flexibility during application.
"Step 4: Position the Vinyl"
Peel back a small section of the backing paper and position the vinyl on your vehicle. Start from one edge and work your way across, smoothing it out with your hands initially.
"Step 5: Apply the Vinyl"
Using a squeegee, begin pressing the vinyl onto the surface, starting from the center and moving outward. This technique helps push out any air bubbles. Be patient and take your time to ensure a smooth application.
"Step 6: Use Heat for Curves and Edges"
For areas with curves or edges, use a heat gun or hairdryer to gently warm the vinyl. The heat makes the vinyl more pliable, allowing it to stretch and conform to the shape of the vehicle. Be careful not to overheat, as this can damage the vinyl.
"Step 7: Trim Excess Vinyl"
Once the vinyl is securely in place, use a cutting tool to carefully trim away any excess material. Take care around edges and corners for a clean finish.
"Step 8: Final Inspection"
Inspect the wrap for any remaining bubbles or imperfections. Use the squeegee to smooth out any areas that require attention. If necessary, apply gentle heat again to adjust and perfect the wrap.Car Wraps
Applying chrome vinyl wraps can be a rewarding DIY project that transforms your vehicle’s appearance. By following these steps and exercising patience, you can achieve a professional-looking finish that stands out on the road. For more detailed guidance or professional assistance, visit www.vinylcarwrapshop.com.

